Miniature Pumpkin Keychain - Free Crochet Pattern
- Captain Null
- Sep 16
- 3 min read

Hello! I am Captain Null and I am very excited to announce my first crochet pattern! I have been a fiber artist for nearly three years and I have spent that time dreaming of creating a pattern of my very own. Finally, after a variety of failed attempts - from a bad attempt at a puddle slime from the video game Slime Rancher, to a not-quite-successful shrumbo from the video game Ooblets - I have come away with something I am quite happy with!
The pattern for these miniature keychains is quite simple. There are only eight rounds for the pumpkin and five rounds for the stem, along with a tiny bit of sewing needed to give the pumpkin its signature shape. So, without further ado, let's get into the pattern!


•☽────✧˖°˖ MATERIALS ˖°˖✧────☾•
⏾ Yarn - Truthfully, the type of yarn and the color do not matter, so long as you have the appropriate hook size (for anyone new to amigurumi, you will want to choose a crochet hook that is one to two sizes smaller than the packaging indicates). Do note that yarns like acrylic will turn out quite small! ⏾ Safety Eyes - Choose whatever size you think will suit your pumpkin best. You may even decide to forgo safety eyes altogether! ⏾ Stuffing - I personally use poly-fil as many fiber artists use, but use whatever stuffing you prefer. ⏾ Needle - You will need a sturdy needle both to sew the stem to the pumpkin itself and to create the signature pumpkin shape. ⏾ Keyring - You will need some sort of keyring or chain to turn your finished pumpkin into a keychain. •☽────✧˖°˖ ABBREVIATIONS ˖°˖✧────☾• ⏾ SC - Single Crochet ⏾ INC - Increase ⏾ DEC - Invisible Decrease (You may substitute for a standard decrease if you prefer.) ⏾ BLO - Back Loop Only ⏾ ST - Stitch •☽────✧˖°˖ PUMPKIN °˖✧────☾•
Round 1: 6 SC into magic ring. Alternatively, use the chain 2 method for thicker yarns. (6 STs) Round 2: INC x 6 (12 STs) Round 3: SC, INC x 6 (18 STs)

Round 4-6 (3 Rounds): SC around. (18 STs)
Round 7: SC, DEC x 6 (12 STs)
If you want to add safety eyes, now is the time to add them. I placed the safety eyes of mine between rounds four and five. You may also begin to stuff your pumpkin now.

Round 8: DEC x 6 (6 STs)
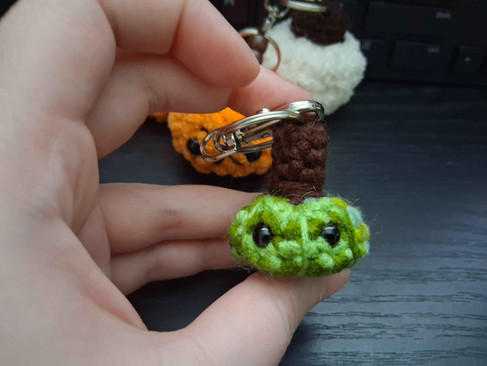
You should be left with a somewhat egg-shaped ball. That's okay! Add a touch more stuffing to your ball, but not too much! You want the ball to be malleable and squishy.

Cut a long length of yarn and fasten off. Use your needle to loop the yarn around the sides of the pumpkin and through the center of your original magic ring or chain two. Pull the yarn tightly to create the segments of the pumpkin, but do your best not to break your yarn in the process. I recommend beginning with an even four sections and add more if you think your pumpkin needs it.


Once you are satisfied with the shape of your pumpkin, tie a knot close to the body of the pumpkin and cut the yarn. Leave the knot sitting exposed on top to secure the segments and put it aside for now.
•☽────✧˖°˖ STEM °˖✧────☾•
There are two sizes for the stem.
Round 1: 6 SC into magic ring. Alternatively, use the chain 2 method for thicker yarns. (6 STs)
If you want a smaller, thinner stem, skip round two! You will finish your stem with four rounds of single crochet. Be sure to make the first of these four rounds in the back loop only to create a nice top for your pumpkin (I forgot to do this for my example pumpkin.)
Round 2, BLO: INC x 6 (12 STs)
Round 3-5 (3 Rounds): SC around. (12 STs)

You may slip stitch into the next stitch or simply fasten off.
To finish your pumpkin, sew the stem over the knot you left visible. Do your best to stuff a small amount of poly-fil into the stem to secure its shape and tie off, hiding the ends in the pumpkin.
The finishing touch will be to add a keyring. Use any method you prefer, whether that is simply tying it on or wrangling the keyring through the top of the stem for a more secure keychain.

With that, your miniature pumpkin keychain is finished! I hope you found this crochet pattern useful, fun, and perfect for Halloween! You may sell your finished pumpkin keychains as long as you would please give me credit for the pattern. If you would like to share your finished product with me, I am on Bluesky as @captainnull.bsky.social!
Happy crafting!

Comments